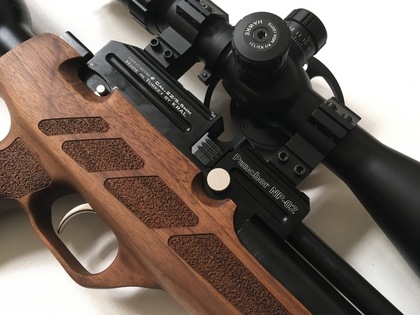
AirMaks Arms at The British Shooting Show
News Events
Create a FREE business profile and join our directory to showcase your services to thousands.
Create my profile now!
PREVIOUSLY ON BACK TO THE BRINK:
“Welcome to back from the brink, a series where we're going to get a gun for less than a hundred quid and try and make it as they've said capable of going on a game shoot.”
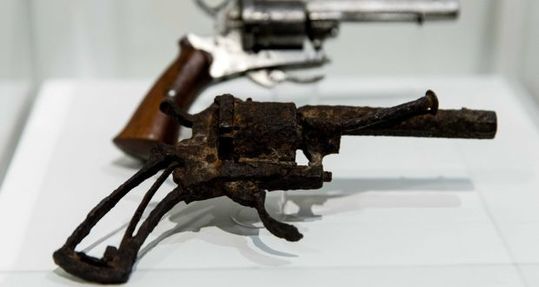
“No idea whether those barrels are Damascus or just silver, there's no indication of engraving - but 70 quid, a private sale, poor condition and no box to fixed choke.
First things first, we’re gonna strip the action and give it a clean because it's filthy.”
“From the very off. This is looking really bad. My blood pressure is coming through the roof after one screw and I’m already really starting to regret this project, but it's gonna be great.”
“So I've alotted an hour to take this action apart and give it a fair clean - but I just wasted 15 minutes onto goddamn screws!”
“Buy Spanish. You're actually not going to get something that’s completely rotten all to hell.”
“So I’m sure you guys remember part 1 - we got the gun, I tried taking the gun apart - it took pretty much half a day take that damn thing apart and I ended up mildly traumatized having to go for a beer after work. But hey, we're back at it again.
Today I'm going to try and polish the action. I say try, not because I can't, but because given all the obstacles we faced last time I'm not getting my hopes up. Anyway, let's hit the workbench and hopefully, we'll get that done and start on the wood by the end of the episode.”
“So I'm currently polishing the base plate and we're going to strip this action or what's left of it anyway, and them I'm going to polish it up.
The pitting on this bit is actually really very very bad. Yeah. So what we're going to do is we're going to take a small layer off with sandpaper, just actually focusing on the areas with a bit more rust and a bit more pitting, just so when we actually chuck it over a polisher with a bit of soap we’ll get a finish that isn't heinous.”
Now I'm going to strip the action. I'll put all the left side lock bits into there, and all the right side lock bits into there. That’s done obviously from the right-hand barrel going in the right, left-hand barrel in the left, because if you turn it like this it's the wrong way round. So as such you line it up, flip it on its back and off we go.
Now let’s have a quick chat about how these things work for those of you who don't actually know. So what happens is that when you open the gun, there’s a little bit in the forend that pushes this down. As this pushes down it pivots around these pins and you'll probably see I stick all the correct pins in the correct piece because it just makes life easier. You'll also notice that actually, these aren't in the best condition - but neither were they in the worst. There's no real big rust there it's just a bit grimy.
So as you open the gun this pulls this down and this pulls this back - this tumbler here pulls back as it pushes up. This is the mainspring, as you push this up this pushes against the top of the action here and compresses, giving you your power drive. Then this with that little spring on the side is broken so I’ll grab a spring from the other side, this little spring here push this down and into the bent here this little notch - hammer notch or whatever you wanna call it then connects to your trigger so that you pull the trigger and that pulls up around its pivot. Click. Obviously, this hasn’t got anything on it anymore because it's close to that. This main spring then goes ‘Boing!’ and this goes ‘Clunk!’. And that's how Boxlock works.
Anyway. As exciting a lesson that was let's continue the strip. Down to the last two screws on the gun on they are being stubborn bastards. It's like this guns been in a flood or something. It's all up to a certain point absolutely rusted and miserable and then after about halfway up the top lever all the metalwork suddenly goes beautiful.
Okay, let's pop this out. That's not too bad. It's not great. You can see where some grime has got in there and you can you know, it's not too bad.
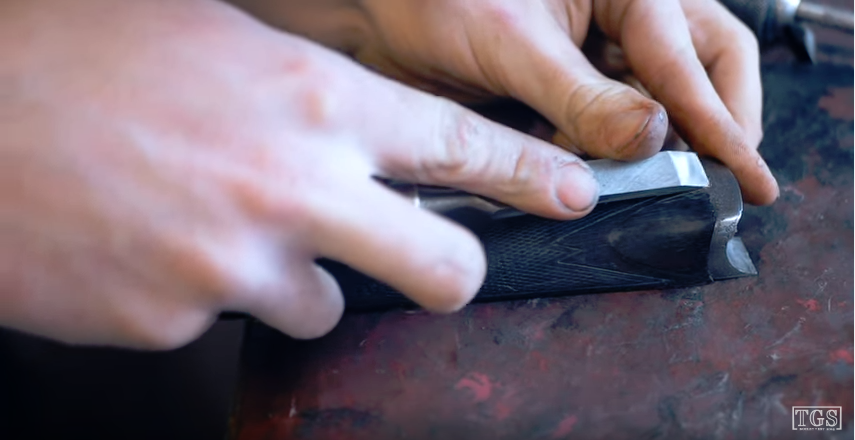
So here we have it. The J. Rowe of Barnstable Barenaked action. The only thing I haven't done is taken out the joint pin, but we're not going to do that because A) I don't need to and B) I don't need to. However what we are going to do is make this shiny.
Right we’ve actually got a little bit of pitting around the back of this safety tang here. You can see we’ve some real grime round here and down the base. We’ll look to remove that and make it shiny. I'm going to do that real quick! And there we go; how'd you like that?
As you can see we have got a very very shiny gun. One of the top tang we actually took down a couple of grades of grit to get up to 2000 grit and then polished it on the sides. The engraving actually is significantly less deep. So we've only sort of giving it a light soaping and to be fair we actually have taken a bit off there. As you can see you’ve still got a lot of staining and actually a lot of micro-pitting that's going to make this whole thing look significantly less nice than it should. However, it is still very shiny. That’s a dramatic change from what it was!
I Know a polished action isn't right. But neither is a fake colour hardened one. If you're not gonna do it right, we might as well just at least leave it looking very blingy and modern and wrong in its own sense. But that’s just my opinion. Obviously, the other bits will still be cold-blued. You know, I'd say that's a dramatic change from the rather rusty nasty-looking heap that came in here. Possibly. It's cool looking. Just not right looking. Anyway, now let's clean up all the rest of this stuff and put it back together.
Okay, so we’ve got these two bits here and we’ve got some of this. I generally actually only reserve this for screw heads, but in this instance, we're going to chuck it on here and see what it's like. You have best results on this by, they say, wiping it over with a paintbrush and I’ve found that you get least good results through that. However, this way just by mildly agitating it occasionally I’ve found the best results have been had. Even though the actual bluing qualities are still piss-poor. As you leave it in here, it goes kind of brown and then it goes kind of light blue and then it’ll darken into a darker blue and then almost even a black if you leave it long enough.
It’s only a thin layer and in all honesty, it’s pretty crap, but it's going to be better than not doing it. The only thing I have done is the trigger guard. However, I might just for the sake of this gun being completely unoriginal - leave the trigger guard shiny. I mean why not.
It’s very rare that you’ll ever see me using something this aggressive, but in this instance, I mean look at the pitting under there, no wonder that screw didn’t come out with the amount of crap that's just been set under here. We've taken a lot of the rust off and a lot of the bluing as well, but I think we're gonna probably just end up polishing this part and go from there. But hey, let's continue getting some of that rust out.
Put that aside and actually because we're gonna want to polish this as part of the woodwork eventually, inevitably. I might go and give it a quickie though.
Well, before we start on the wood I just want to see if I actually need to address that crack. I think it's not so much of a crack because actually, it’s just in the very surface. It doesn't swell or anything and it’s a real oddity to be honest.
Sure, breaking it and doing something about it - there's very little we can do as much as I'd love to in reality. The answer is, to leave it and address it when it gets worse probably.
Right, now speaking of which, first things first let's go for the big gains from little work, that’s what it’s all about.
Like with all these projects you have to take everything with a pinch of salt and actually at this point, what we've decided is that there’s very little point in investing huge amounts of time making this stock look beautiful. Given it's got that little crack in there it could snap in half at any time, and once you've done that you're then going to have to refinish it anyway, so what we're going to do is a light refinish. So we're going to keep a few of the knocks and a few of the dents - keep a little bit of character in this gun because we're not actually taking it back to original as we’ve said, so we want to keep a little bit of its character and not just produce a glitzy useless thing. However useless a black powder proof-only gun is.
As such we’re going to go straight in with some 600 grit, take the top finish off. We're going to take a little bit off and then going to use some steam to try and raise a few of the dents, go back to 600 then 1200 and then stick a finish on it and probably just chase out my borderlines with a ninety-degree checkering cutter.
I suppose just leaving a few dents in actually would be quite nice for a bit of patina. There’s old-looking, which is this side - you've got the odd mark here and it's quite nice and it's got a little bit of character to it, then there’s this side which looks like someone's been beating fence posts in with it - it looks crap. So we're on the 320 grit and we’re actually going to take out a percentage of those.
The other reason we went to 320 is that this pad has oversized; different things shrink at different rates regarding the moisture that was put in them originally and the fact that this has been around 140 years. The horn hasn't drunk as much the wood and there's this whole horrible lip, so we’ve knocked that out as well. Just trying to give it a little bit more Pizazz.
Alright, so there we go. We’ve still got a few scars, we’ve got a little open pocket there and quite a few big dents on the back. But actually what we've done is removed whatever happened there. There's a lot of scarring there; removed that quite nicely. I'm quite happy with where we're at. What we're gonna do is going to dry her off, chase the checking out chuck a finish on her.
There’s this weird red stuff in there. No idea what that is. Probably lipstick from where some was caressing this gun before. What we're going to do is just chase out some of the dirt and that's with a really light Parker Hale Phosphor Bronze 20 Bore Brush and no pressure at all, all you're doing is just sort of coming over and checkering one way then going over through the other way and you’ll surprisingly take a lot of crap. If the wood is supremely soft or anything like that, please don’t do this because you’ll damage it. Now, just a light check actually will reveal that this is indeed checkered where you may before have thought otherwise - there’s still plenty of bits where it's rancid though.
Given that we don't really want to start checkering this because once you start you cannot stop, we're just going to use this as a single line chase that we know and just chase our outside lines here to try and give ourselves a little bit of definition. Some spots here there is nothing to work with so we’ll have to guesswork it. Let’s start somewhere that's actually less difficult like on the outside line here. You can see those really deep scrapes as much as we've taken a bit out of them - they're still there and very much present.
I don’t know if you can see but there’s literally nothing here to work with apart from that dark stain line. So actually as much as I'm going very slowly it might look like I'm fannying around. That's because I am fannying around but I'm trying not to. You can do this in a checkering cradle but to be honest, I don't do a huge amount of checkering and I find it a great workout for my left forearm; which keeps me balanced.
So I made a massive mistake and decided to try and chase out some of this red stuff but accidentally used this cutter which is a little bit too steep an angle to cut a re-cut flat point and as such there’s gonna be a slight bit of mildly different checkering but I’d be rather that than have the red lipstick crap in there.
So I'm losing it, particularly with this gun. But I feel like it was a mistake to perhaps not do a complete and utter honest full refurb as opposed to doing a more light one. However, the time and investment that goes into actually doing a proper full refurb runs into the thousands of pounds and this gun is barely worth three. Pounds.
Realistically I should now get a multi-cutter for this but all of my bought ones and shop-made ones don't fit because the checkering pattern is really weird. So it's a half size so I could make up a block for it, but there doesn't seem much of a point for that. So we’re just very carefully chasing out the lipstick.
I did exactly what I said I wasn't gonna do which is checkering in the middle, but it’s still so damn warn that I just couldn't resist and I've started and then you do a bit and then another looks bad and I've not ended up checking the whole thing, but I really might as well of. I'm afraid I might even just end up checkering the whole damn thing. Well I said you want to keep a bit of character so actually, you know what I'm going to do, I'm going to take the nice bit of checkering and chuck this over the top harshly now instead of softly and harshly putting this over the top of the nice new checkering will blend it all in and the world will be better.
We're ready. Oil number one. We might make this way too light and this will look out of place, but you gotta try these things because when it was just wet actually the wood looked stunning.
So after coat number one, this wood is immensely dry. But tell you what, actually where that would oil is soaked in a bit, it’s darkened up and actually this stock isn’t bad looking at all. Surprise surprise something that's gone vaguely right with this project.
Now the real downside to this is that that can live up there and we get to address this. What we’re going to do with this very simply is going to pop the forend iron out. I am literally just going to chase the edges out. I know that's such a lie, isn't it? But I'm gonna chase the edges out and going to polish the metal work. The problem is where this wood’s shrunk - I don’t know if you can see that - all the ironwork and stuff is actually protruding but it's so beautifully and intricately engraved. I don't want to flat this back to blend in. It's decisions like this that do cut me up quite a lot actually, so I don't know. What I do know is that I'm just going to crack on.
Oh no, maybe we just leave the iron in? I hate it, I really do. We’ll use more force. Look, oh the ratchet I love it. The ratchet was the best invention in the entire world - the ratchet screwdriver. Whey, and we’ve popped this beautiful beast! And look at that beautiful beast in there. I’m just going to pop this lump in here and pop that off of there. Comes off relatively easily, that’s actually not into bad order which surprises me a little bit. It’s actually only rust that’s pushed it out by the look of it so hopefully, we can chase all of this rust and crap out. Be very careful because you know many hours of past working on this rather delightful gun. Actually, as you can see just from the tip area here we've recut just the outside border of the pattern there and it does add something, there’s no point checkering this because actually if we pay a little bit of close attention there’s not a lot of meat left. There are a few holes and here. It's shrunk to the screws which is bad and short of, I don't know, dipping this in water and rehydrating a hundred years of shrinkage it doesn't really matter. Anyway, I'm gonna shut up and carry on.
What we’re actually doing is we're just going to re-carve these carved parts here, and we're not doing masses. We're just looking just to tuck them in a little bit around the edges. Very carefully as well, obviously because we're not idiots.
We’ve got some really bad news as regards to this gun. Actually, we're talking a little bit longer term here is this gun will never leave this shop. Between pitting, dents, bulges, flaring at the muzzles, there’s literally no way this gun would ever pass proof. I mean it might but is it ever worth making it go to proof? Not at all.
As such, this will be its final destination.
Dent number one - gone. Move on to dent numbers 2, 3, 4, 5, 6, 7, 8 & 9. I think I’m gonna stop here, to be honest. The stocks looking nice, the barrels are as much as I'd like to cold brown them have actually they've got that kind of nice patina of age. We've taken the majority of dents out and that’s going to make them more shootable. The only real disappointing thing here is the fact that those barrels are just so far out of proof. To the wind of I'm not scared to go and shoot them with light Nitro loads or light black loads to be fair.
But there's something about this project. This just being a wall hanger, needs to stop here. However, before this gun does get hung on the wall, in the next episode we'll get it saddled up put back together and we're going to go on out and shoot it one last time...